If your customer asks for a hosted account running on our cloud, simply follow this instruction manual in order to add one.
Note: if you want to add a new account using our REST API - follow this guide.
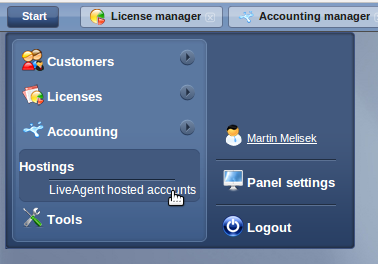
1. Log-in to your reseller panel
Then go to Start->Hostings->LiveAgent hosted accounts
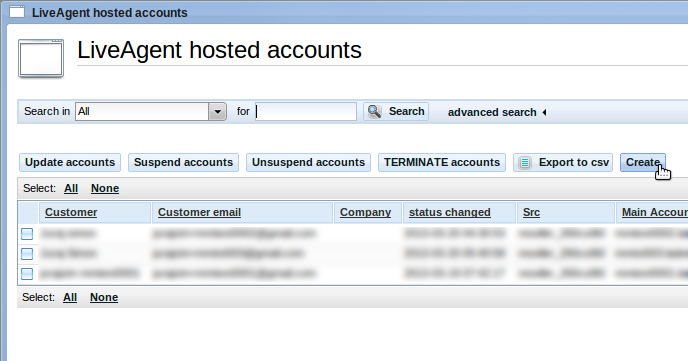
On this screen, you can see all your hosted accounts in one place. You can filter, suspend, unsuspend or terminate them. You can also create a new one.
Note: Creating an account manually will also trigger the URL notification, in case you're using our REST API methods.
2. Click the create button
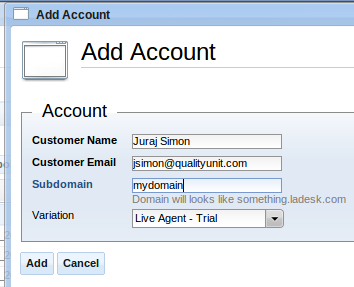
3. fill-in-the create dialog
All listed fields are mandatory. The customer email must be valid an email address. Also, the Subdomain must be the valid domain name. It must not contain any special characters or spaces.
Note: The account will be installed on a domain such as mydomain.ladesk.com
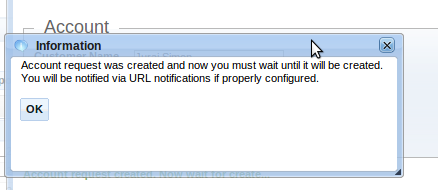
4. Hit the create button
If all goes well, you will be notified that your account is being created.
Note: The installation will usually take just minute or two.
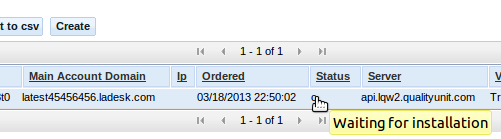
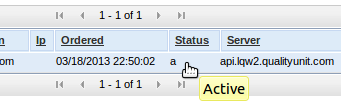
The accounts grid informs you about the account status.
Note: Account in status "Waiting for installation" is not yet accessible via its domain name. You must wait until it is in the "Active" state.
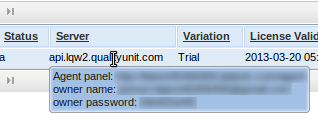
Finally, your account is properly set-up and ready for use. You can view the access information by clicking on the server column.